At the beginning of the Summer, I had this great idea of getting the alignment done on the bus before festival/camping seasons started. I realized I hadn't posted on that odyssey, so, since I just did the last little bit of fixing, I'll cover the whole thing today.
Mis-Aligning

Like I said, I started with the simple goal of having my alignment set. I had been describing driving the bus as a "full body experience", requiring the dexterity of a kit drummer to keep it on the road and motoring along. The biggest issue has been the degree of play in the steering wheel. I figured maybe the alignment was a good place to start. These old buses have a special way of setting camber requiring a thin 36mm wrench on what is called the "eccentric bushing". This bushing is integrated into the ball joint, but off-center, allowing for the camber to adjust as you move the wrench side to side. These bushings scare off many alignment shops, which I find almost amusing. They have these fancy computers to get things dialed in perfectly, but lack a 36mm wrench. Whatever. I did find a place here locally that would do it: HM Motorsports. They are a spin-off business from the local VW dealer, so they have the VW smart-guys plus the high end computer stuff. They were able to tell me that the camber was good, but one of my tie rods was bent, so they couldn't do a full alignment without replacing it. They asked me for $400US to replace that arm. Uhh... no thanks, but they did charge me the full $90US for the alignment anyway. I guess they tried, but they probably should not have once they saw the bent arm. In fairness, I should have noticed that at some point over the last 15 years myself and not taken it to them before replacing it.
Tie Rods
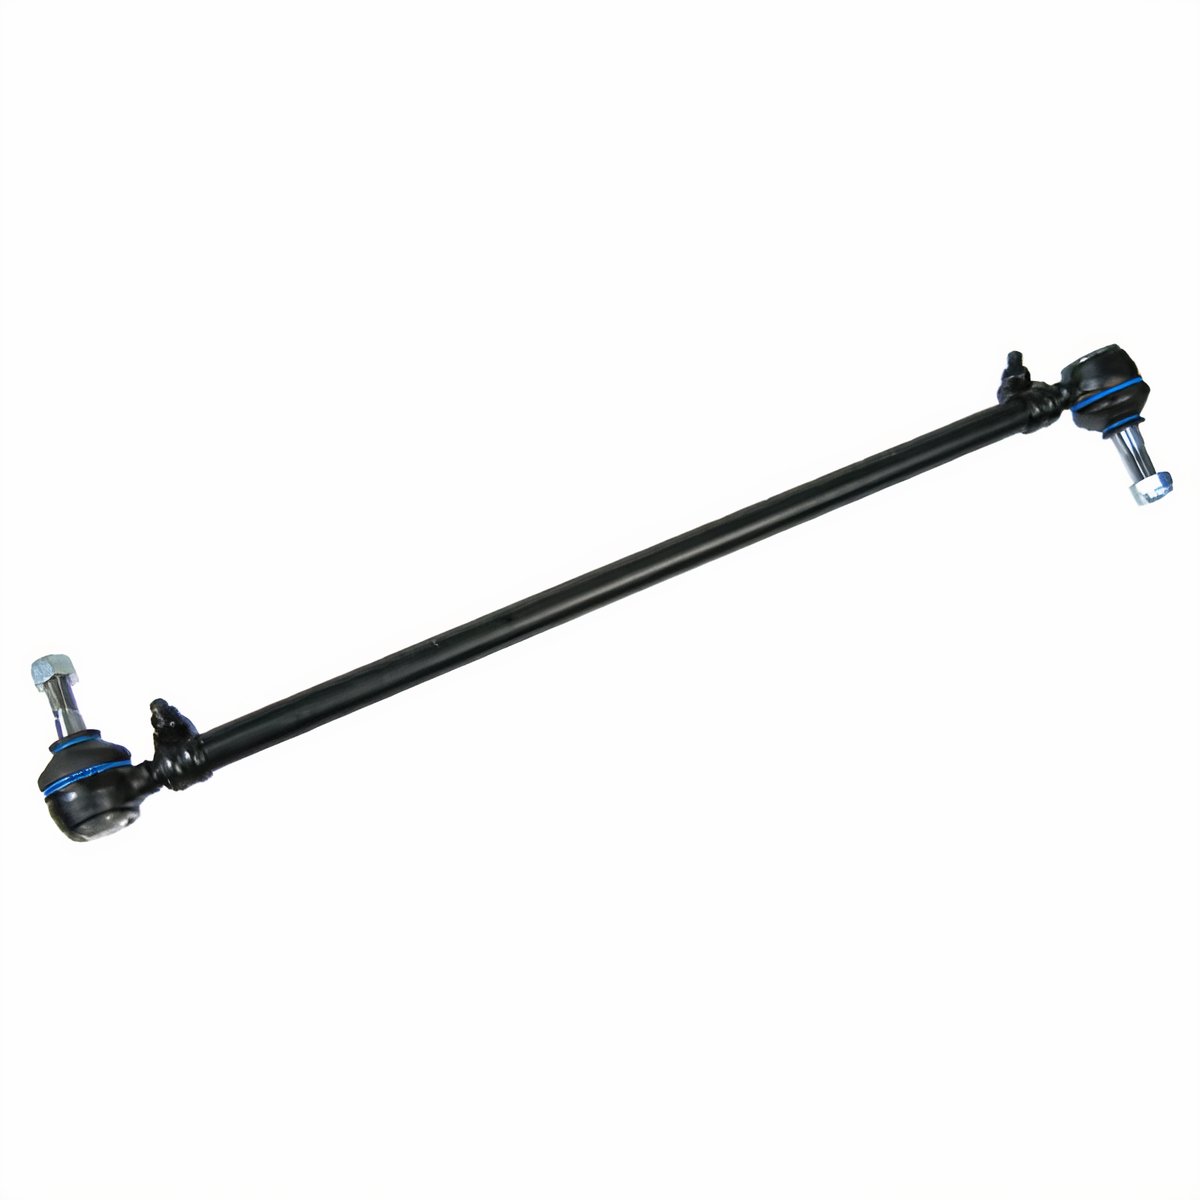 |
| JBugs image of a tie rod |
I ordered a pair of tie rods from Discount Import, and had T pick them up for me while he was there getting parts for Nemo (the A4). They charged me $35US each. The replacement was fairly easy. I started with getting the wheels as straight front-to-back as I could, centering the steering. Then, I replaced an entire arm, one at a time. The arm runs from the swing lever to the steering knuckle across the rear of the front beam. Each end of the tie rod has a 90* "end" on it that allows for controlled rotational movement. If the end can move at all any other way, it's bad. Since one of my rods was bent, I replaced the whole assembly, ends and all.
Rods Out
The ends are nutted down with castle nuts which are held in-place with cotter pins. The cotter pins may have rusted into place on yours, requiring more coaxing than mine did. Even as original parts, I was able to bend the pins back and push them out. Then the nut comes off. Last, the end needs to be separated from the knuckle or swing lever. This usually requires a pickle fork and a hammer, which will destroy the rubber boot on the tie rod end, so be sure to plan accordingly. I was able to free the tie rods by hammering away on the pickle fork. The passenger side released from the swing lever with just a couple whacks. In contrast, the driver-side steering knuckle took many many more. I have read of some needing to apply heat with a torch to get these to separate, so be prepared. Once removed, I cleaned up the holes with some WD-40 and a rag. Then, I scrubbed them with some sandpaper to make sure there weren't any sharp edges left around the holes from my removal efforts.
Rods In
 |
Nicked from Interweb,
shows swing-lever end
and steering dampener |
Oftentimes, the supplier will sell/send you two adjustable rods. This may be correct for some cars, but for the old bus, one of them is supposed to be fixed length. Discount Import only carries the adjustable rod, so the opportunity to do this wrong goes up. I followed this process for the not-bent side: measure the old rod from end to end on the top side (opposite where the threaded bolt comes out). I then adjusted the replacement arm to that same length, and then tweaked it until it dropped right into the holes. For the bent arm, this process wasn't effective. Measuring a bent arm wasn't going to get the exact length, so instead I matched it to the not-bent arm on the other side. Rather than touch the steering wheel or the tires, I adjusted the arm until it dropped into the holes. With the arms in-place, I could do a ShadeTree front alignment. Replacing the arms took less than an hour, so even at my "my free time is worth $50 an hour" rough math, I saved over $350 doing it myself versus having HM Motorsports do it.
Steering Dampener
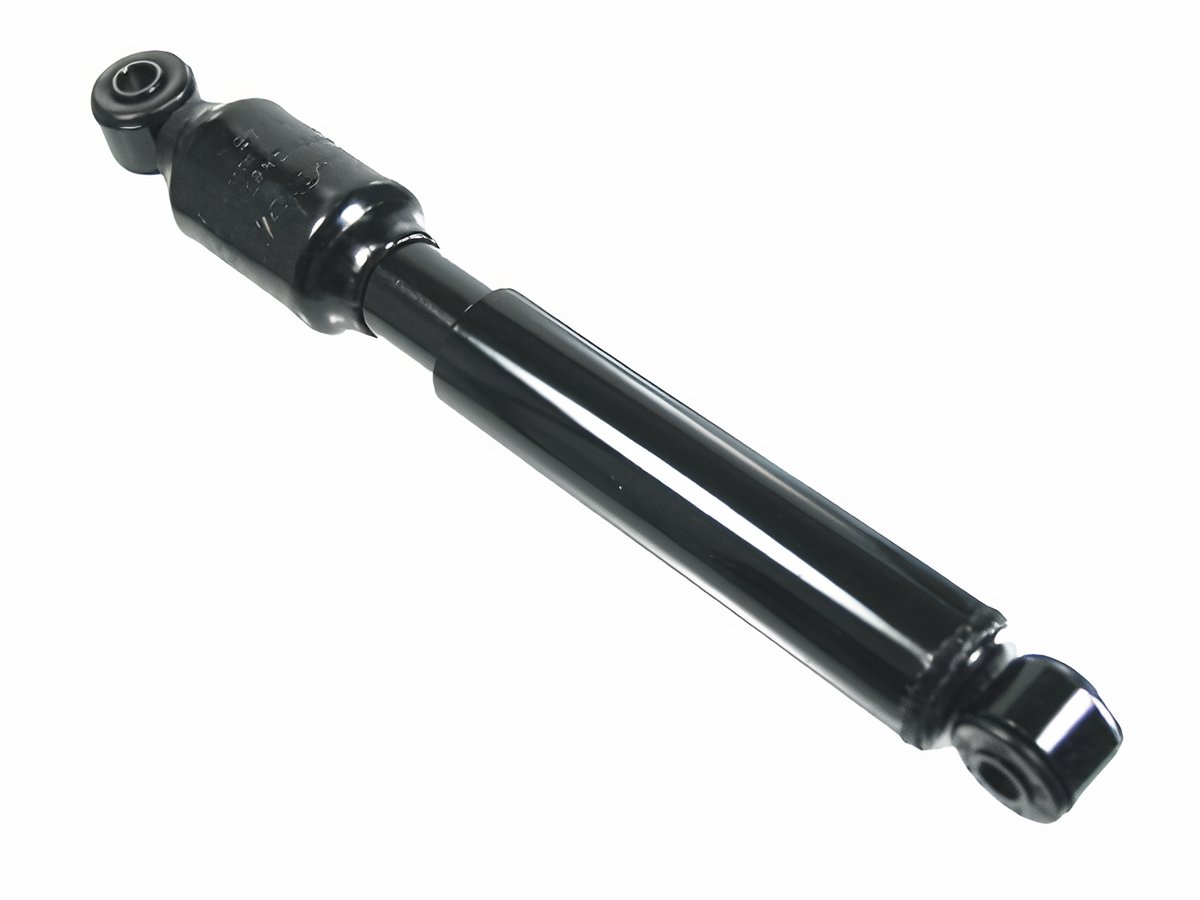 |
| Jbugs again |
Before I put in the new rods, I took the opportunity to replace the steering dampener. This is a small shock-absorber that helps cushion the driving experience at the wheel from sudden jarring affects of road hazards. Consider how much the steering wheel hops when you hit a pothole. For a car with a working front-end, it's not too bad. If your steering dampener is shot, the steering wheel gets a mind of it's own for a second. That's dangerous at any speed. In the bus, with the higher center of gravity, it's downright scary. I highly recommend replacing yours if you have no idea how old it is. I got mine when I got the tie rods for $30US. It's held on with 2 bolts (17mm, if I remember right), like a shock absorber, and it is actually pretty easy to get at when the tie rods are off.
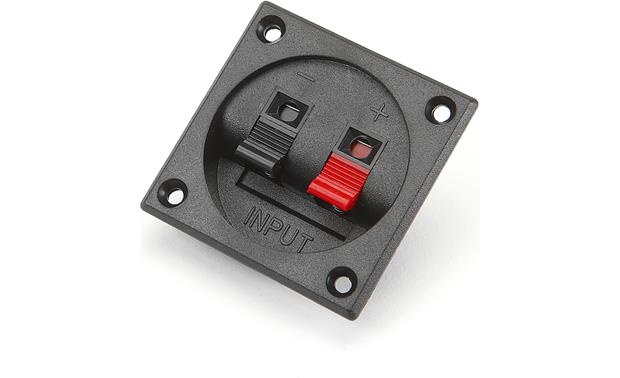
ShadeTree Front Alignment
With the steering dampener and tie rods refreshed, I was ready to get the alignment roughed in for a test drive. All cars are a little different, so the measurement below may not work on yours, but it worked on the bus. Measure the distance between the front-most part of your front tires (looking at the front left tire, at 9 o'clock). Now compare that to the distance between the rear-most part of your front tires. The measurement from the front should be between 0" and 1/4" smaller than the measurement from the rear. The varying length depends on your tire size; I'm running stock diameter, so this works. Ultimately, this effort should be sufficient to get you to the alignment shop. This is not an ideal permanent setting.
 |
| PartsPlace.com image |
If you have just one adjustable tie-rod, the adjustment is more straightforward. Since I had two, I adjusted both sides one turn at a time until I hit the 1/4 inch number. Based on how the arms adjusted, I used to have no-toe or a slight toe-out. In my experience, the steering becomes less predictable with toe-out, so I'm good with a slight toe-in. I test drove the bus first slowly in the driveway, then into the dead-end street and finally around the block. The steering held much more firmly over bumps and when the street was level, and there were no bumps, it held a straight line with my hands off the wheel. There was still 3-4 inches of play at the wheel, though, when I did want to change direction.
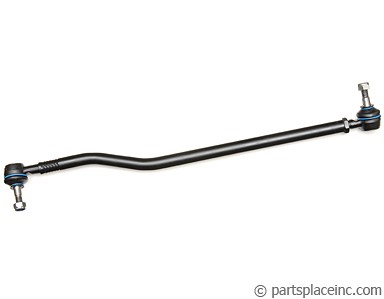
Drag Linking
To resolve the remaining play at the wheel, I asked Boo to sit in the driver seat and turn the wheel left to right while I laid-hands on various parts of the steering system. I could see the steering coupler turn, and feel the arm move, but the drag link didn't move right away. It had a significant delay, and made a clunk noise when she changed direction from right to left (not left to right, which was weird). I rested my hands on the swing lever to see if it had any up/down movement. I couldn't feel any, so that lever and the pivot pin should be fine, unless my novice hands couldn't feel well. Other than the steering box, the swing lever was all that was left if replacing the drag link didn't fix the steering play. I resolved to replace the drag link, and bought one at Discount Import ($50US). If they had had a swing lever kit, I would have bought one since the 90 minute round trip can eat up a day if you need to do it more than once.
 |
old drag link,
broken pickle fork |
The drag link removes just like a tie-rod: pull the cotter pins, remove the castle nut, and apply force with a pickle fork to pop each end free. The drag link removes and installs from the front with the non-adjustable end pointing to the rear. I broke my pickle fork as you can see in the picture to the right. I guess the Harbor Freight fork isn't made very well.
Similar to the tie-rod, you want the replacement to be the exact same length as the old one. In the PartsPlace.com image above, you can see an adjustment lock-nut on the right end. I placed my old and new side by side to get the length correct. Take care as you pass that rear "end" through the hole in the support so you don't damage or tear the rubber boot. I left the plastic shipping cover (visible in the picture) on the end during pass-thru so it wouldn't get damaged. To get the end to fit into the swing lever, I put a socket extension onto the bolt and used that extra torque to position the bolt to easily fit onto the hole. The front end slid right in without any extra fiddling, so I knew I had the length right. If you aren't so fortunate, repeat the measure and fit steps otherwise your steering will not align properly. Last, I threaded and torqued on the nuts, inserted the cotter pins and closed up the belly pan.
Test Drive
This final test drive was quite different. The steering is genuinely responsive, with less than an inch of steering wheel movement before the bus starts changing direction. When combined with the steering dampener, it drives like a completely different vehicle. I know I should take it to have the alignment done, but honestly, I probably won't. It handles so well, holds center during acceleration and braking. Since the caster and camber were within spec before I started replacing parts, and the parts I replaced have no bearing on those settings, I may let it ride as it is.
So, Hapy is fully operational again... just in time for winter. I have plans to address rust this winter, after I complete the interior of the MGB. And, of course, there's the 280ZX that neither C nor I have given much attention to. Clearly, I have lots of content waiting to be generated.
That's it for today. Thanks, as always, for following along-


