Tuesday, July 26, 2011

Riviera Top on... Mostly

With the help of a couple of friends, and my 2 boys, the new Riviera pop top moved from my garage floor to the top of the bus.  We made some discoveries along the way.  Today, I'll back-document what happened.  It was hot and long, so I'm very grateful to both Ed and Toby for sacrificing a nice Saturday afternoon with their families to be with mine.

Preparations and Discoveries
initial placement. Toby eyeing things
After the test run last Thursday, I felt comfortable moving the bus out into the driveway of the complex.  So, as Ed was arriving, I got the bus into position just outside my garage.  While still exchanging pleasantries, Toby arrived, and we were ready to go.  I'd spent a couple of hours before they arrived digging through Toby's photo album dedicated to the Riviera pop top removal he performed.  Through examining his pictures, and my interior, I made some important discoveries.  These were confirmed, as you'll see.

showing cut-out "X"
First and foremost, the Westy was based on the sunroof style transporter while the Riviera was based on a standard transporter.  This drove a few differences which are important.  The sunroof bus has 2 roof panels with a 2" gap between them running from the rear of the opening back to the rear of the bus.  This is where the sunroof slider would hide when the roof was open.  The front of the sunroof opening is not straight, either.  There's a kick-out off-center on the driver's side where the sunroof crank would appear.  Contrast these 2 conditions with the hole cut at the Riviera factory in Beaverton Oregon (where Riviera's were made), and things get interesting.  The transporter has only the one roof section, for starters.  The front of the hole is straight.... and about 3 inches closer to the front.  Also the sides were closer to the drip-rails in the Riviera bus than the Westy hole.  When we looked at how the interior foamy bits all tied together, its clear there will be some customization needed.  More importantly, though, the Riviera facto
after cutting p-side
ry firmed-up the hole by applying wood strips around the underside of the hole and mounting wood strips (which are a-fixed to the bellows) through the steel from above into the wood strips below.  Since these lower wood strips roughly aligned with the support steel Volkswagen installed in the sunroof transporter, the lower strips can be ignored for our install.

Top On
extra 6mm screws.  frame sits in the rail
It is with those differences in mind that I chose to not do anything to prepare for the top install prior to the guys arriving.  This meant that the first step was actually the step I needed them for: muscling the top onto the bus.  They kindly recognized that I'd just painted the roof, but there wasn't a way we were going to get that top installed without scratching it, so I said as much and we jumped in.  I took the back, Ed took the passenger front corner and Toby took the driver front corner.  This put Toby in the spot of having to climb into the bus during the install.  We approached the bus from the rear passenger corner, lifting vertically while moving towards the front.  The 3 of us were better able to get it on the bus than we'd expected.  The quick-part ended there, though.

thanks Toby.
The lower bellows frame for the Riviera top is not flat.  There is a portion of the wood frame that hangs down into the hole.  The Riviera-shaped hole.  I have a sunroof-shaped hole.  They aren't the same.  Enter saws.  To make the frame fit, 3 inches of lower frame needs to be notched out.  The notch needs to be 1" high (up to the bottom edge of the bellows).  With the notch cut out of both the driver and passenger side fronts, the lower frame started to fit.  We spent the next couple of hours measuring and remeasuring, shoving the lower bellows wood frame around to get it into the right spot.  Once we got the spot set, we started chewing through drill bits trying to get a pilot hole bored.  Fun times.  There are 3 hex-topped (6mm) screws on each side holding the lower bellows frame to the bus-roof.  Since we omitted the lower wood strips, we put 2 more 6mm hex screws through the lower bellows frame into the sides of the sunroof hole.  To make sure we were square, we brought the bed plywood sheet (under the bellow frame) and set everything.  Re-measuring. Re-setting.  Then, we marked the holes, moved the lower frame out of the way, bored the holes and screwed it down.  We're square, and the bellows are fixed to the bus-roof.
back home w/top on

Next, I need to resolve the water barrier at the bottom of the bellows and get the scissors-supports mounted. Then, I'll clean-up the top interior and the foamy customization I mentioned earlier in this post.  Should be a productive weekend.  Oh, I almost forgot: he fits in the garage.... once I disconnect the auto-door opening, push the door as open as I can make it, and hold the door open with a vice-grip!  Love it!  As always, thanks for following along,

Saturday, July 23, 2011

Fear, Loathing and Driving in Circles

2 items today.  Broken alarm on my Jetta, and test driving the bus.  Its a beautiful day and I want to get out into it, so this post may not be as tidy as some of my others.  Apologies in advance.

Fear and Loathing
I have the boys this week, and that brings a different rhythm and a very different schedule around the house.  They enjoyed a camp at the local Park&Rec except for Thursday.  Which is where our tale begins.  I've had on-and-off problems with the door lock on my Jetta over the years.  3 years ago, I took it to my good friend Justin to fix the door switch.  The computer couldn't register when the door was open or shut, and thought it was open all the time.  This caused the puddle light to stay on all the time and run down the battery.  It eventually caused that annoying door-ding to go off while I was driving, etc.  Well, he tore the door don, pulled out the switch cleaned the snot out of it, and re-installed.  Problem solved.  Until recently.  Thursday, to be exact.  I couldn't disarm the alarm with the key.  Triple-A came out with a locksmith and he couldn't do it.  He said "take it to a dealer.  My guys tried to fix one of these once and it took 4 of us 4 hours".

Fear.

Loathing.

I called work, took the day off, and set to fixing it myself, with the help of VWVortex and my Bentley.  In just over 2 hours, I had the door in pieces, the switch cleaned and tested and re-assembled.  I do want to cover the testing process a little bit since this isn't documented anywhere that I could see.  The door lock mechanism has an 8-pin plug receiver on it (male pins sticking out of mechanism surrounded with a plastic ring for the plug to snap into).  After checking the electrical diagram in the Bentley, the #7 pin is ground.  Frankly, it wasn't clear which was the signal from the Bentley.  So, I figured when the switch was engaged, it either was set to ground when the door was open or set to 12V when the door was open.  I just needed to determine which was the signal pin.  How?  I tested connectivity between pin #7 and all 7 of the remaining pins each time I passed through a cleaning.  In the end, the #8 pin is the signal pin, and it goes to ground when the switch is open (IIRC).

Knowing this, I can think through a means of testing that circuit, and cleaning the switch without tearing the door apart every time.  I say that because I know this will happen again.  The switch is located under the locking mechanism, so dirt and grease get into the switch eventually.  This causes the switch to no longer make contact, fouling the signal.  Perhaps this could be solved simply by boring a hole near the switch so cleaner can be shot into the switch from the outside.  Sealing the hole with a rubber bit would keep dirt and water from getting in, but this would make the whole thing much more maintainable.

the Rounder We Go, the Faster We Get
I test drove the bus yesterday.  After struggling to get him going, and spending an hour trolling web sites for clutch engagement hints, I think it was again just a case of lack of movement.  Figure he hasn't moved since April, and even then it was just from a trailer into the garage.  Yesterday, though, he got a little workout, test-track style.  I drove him around and around the same loop of streets (right turns, so anti-NASCAR style) until his temperature got up into where the thermostat should open.  Worked.  I got him up to 185* and he sat there for a full loop.  The temp fluctuated up and down after that, but steadily climbed.  I don't think the fans kicked on, but I wasn't sure.  Rather than risk troubles, I parked him and noticed the coolant was leaking from the same hose-connection.  Drat!  I tightened the connection until I couldn't tighten no more and the leak stopped.  I topped off the coolant (and some distilled water), and I'm ready to test again.  He drove very well.  Peppy, and not nearly as loud as I expected.  Remember, he has no roof, so there's air-noise there, and the windows were all down.  Still, I could hear the "tink-tink" of the turn signal.  I think we have a winner.

Ed and Toby are headed over today to help me any my boys (T&C) put on the new pop-top.  Its gonna be a hot day, so I need to prep as much as I can to reduce the time we need to be hefting that top in the heat.  That means getting off this PC and digging into the bag of parts Toby gave me when I bought the top.  If they're all laid out, and I have some idea where they're supposed to go ahead of time, this could go a little faster.  Still, its gonna be quite an undertaking.  I'll take pictures and post on it soon.

Thanks for following along-

pictures:
top - driver door in pieces just before I removed the lock mechanism.
middle - test driving, "view from the bus" :)
bottom - the UltaGauge showing 186.8*, near the end of the drive

Sunday, July 17, 2011

Road-Ready when Rain Relents

I didn't have the boys last week, so in theory I could have gotten some things done on the bus.  Instead, I went out for drinks, messed around with my media-center-acting PC and worked late a couple of times.  So, that left me entering this weekend with the bus in the same shape it was in when I left it on July 4th, pretty much.  With Fall-like weather pressing in around us in the Pacific Northwest (read: pouring rain almost all day), I appreciated the garage all the more, and I want to be ready when the Summer days (read: sunny and dry) return.  I'm about an hour away from being truly ready, but I'll cover what I got done to get that close.  In the background, I'm watching the Overhaulin' episode when they did a 21 window bus.  Never seen this one...

Harness Swap #7
I mentioned in my last post that I'm giving up on the original harness.  I've lost too much time to it now, though a replacement is spendy at $150 on eBarf.  I've put so many hours into the original, I hate giving up.  I could charge $5 per hour on my time with the original and be able to pay that $150.  I used to decide whether to hire someone to do something based on how many hours it would take me to do it.  We should all highly value our time, and I need to think that way again.  If I'd thought that way, I would have given up on that old harness after a few hours and bought one by now.

I had a "shower epiphany" yesterday for how to use Justin's harness without damaging it while still getting an oil pressure signal.  I don't want to cut a single wire on his harness, but the plug end on his "newer" harness doesn't fit my blade-style sensor.  I could buy a newer sensor, but instead, I took a short 18gauge wire with a female-blade end on it.  I stripped the other end and simply jammed it into the plug.  Taking care not to mess anything up, I verified the connectivity, and a-fixed it with some simple electrical tape.  Will this stand the test of time? Heck, no, but it's not supposed to.  It just needs to last until I have $150, which should be the middle of next month.  So, out came the original for the last time, and in went Justin's... again, hopefully for the last time.  That was this morning.

Cool and Clean
With the engine harness resolved for test-driving, next I needed to be sure the fans would fire.  I hit the Bentley to the test procedure.  I should have done this before, but I was installing this outdoors in the rain, so I'll forgive my self.  On the test, though, it failed.  I dug into the Bentley wiring diagrams, and that big fan control module isn't even useful in my installation.  From what I could tell, it is necessary for A/C, and if you have the auxiliary coolant pump to continue to circulate the coolant if it's hot on shutdown.  I don't have that, nor do I have A/C.  Honestly, if I need that kind of thing, I'll buy an electric coolant pump from a yard and tie it in with a simply relay.

Anyway, by not needing all that, I had a bunch of extra wiring I needed to get rid of. The view from the rear is now much cleaner too.  The small wire bundle that used to run down along the engine harness is now gone.  Now, there's a single fan power wire running from the fuse block a-top the battery running up to the rad.  It passes through the temp-switch there.  It is a "2-speed" fan switch, so I have the front fan running to the "slow" and the rear running to "fast".  I will eventually tie both fans into the "fast", but I need an isolator of some kind.  Regardless, I re-performed the tests, and we have power to the fan.  Just to prove it, I cross-wired the source to the fan, and "whirrr", the fan spun to life.  Sweet... we're ready to test fly.


So that's what I did today.  I messed around yesterday too, but I'll get to that in another post.  With the pouring rain today, and rain forecast into the week, I don't know when I'll be able to try giving the bus a drive.  Remember, he doesn't have a top, he looks like a sunroof model, except... there's no slider!  So, once the rain stops, I'll start test driving to work, the boys to camp, etc.  I guess I should start with starting him and driving out of the garage, eh?  Stay tuned....  This last picture here stands as a reminder to take a seat in the driver's seat from time to time to remind yourself why you're going through all this trouble.  There is no view like the one out the front of a flat-nosed vehicle.  Thanks for following along...

pictures:
top - retrofitting a plug for a spade connector
middle - cleaned up view of wiring through rear-access
bottom - view through the windscreen in current spot. that thing suctioned to the windshield in the middle there is the holder for the UltraGauge

Monday, July 11, 2011

Going Topless

This should be the last posting about my July 4th weekend activities.  I'll get to the subject line in a second here, but first, a funny story from the weekend:  Remember, it was a hot weekend for NW Oregon, so the doors were wide open, the blues from the festival were playing, and I was toiling away.  My apartment is right on one of the 2 exits from the complex, so half the folks that live there drive past my door.. and my garage.  So, mid-afternoon on Monday, a guy with a european accent driving a black Audi stops in the middle of the driveway and shouts "is that a Looney?" out the window.  After 2-1/2 days of work on the beast, I must have shot him an ugly look cuz he immediately retreated his tone and explained that when he was a kid that was what the folks called them because the hippie kids drove around in them.  Huh, I thought.  I'd never heard that one.  In fact, I can't find that reference via Google either, but I'll take his anecdote over the "series of tubes" :) And I decided then that I needed to start cutting down on the caffeine.  Wish me luck.

Single Cot Removal
In order to remove the old Westy pop-top, the cot needs to come out.  The cot is held to the top of the bus with 4 bolts and 2 screws.  All of these are Phillips-head, and the nut on the bolts fit a very small cresent (6mm or smaller).  With the bolts and screws removed, the cot can be slid out of its spot.  Rotate the rear end towards the driver side, and the rear mount can drop through the hole.  Then, slide the cot out to the rear.

Luggage Rack Removal
The Luggage rack has been off my bus a couple of times already, so this was just a re-run for me.  The rear of the rack is held on with 3 long Phillips-head screws: 2 through the corners and one in the center. Under the top, there are rubber snubbers to allow water to pass under the edge of the rack.  The front has 2 screws and a few bolts.  I say a few, because I think at least one of mine was missing.  Regardless, the screws are on the far right and left edges and the bolts are through the more centered holes.  Once removed, the rack, comes off pretty easily.

Pop-top Removal
First, my removal was driven by my top suffering significant dry-rot.  It was so bad, that the whole thing started falling apart, tearing along the sew-lines and right through the middle of the material.  So, my removal was much more destructive than yours may need to be.  I started with the removal of the lower billow hold-downs.  These are flat silver metal bars that are screwed into the top of the bus, pinning the bottom edge of the billow to the top of the bus.  There are many many screws, probably one every 4-1/2 inches.  There are 4 bars, one each across the front and back ad one each along the sides - each one wrapping the front and rear curves.  I was unable to free all of the billows because of clearance at the front (hinge-end).  Next, I removed the 3 bolts which hold the hinges to the bus-top.  This created some instability for the rest of the removal, as you can imagine.  I then moved back to the rear and removed the bendy-arms.  These are held to the bus with 2 small Phillips-head screws and to the top with a single bolt per side.  The nut on the bolt is the same size as tiny nut from the cot I mentioned above.  The bolt, again, it s Phillips head.  Seeing a pattern?  At this point, the only thing holding the top to the bus it the front bit of lower billow hold-down, so I cut the billows with a pair of scissors, freeing the top.  I then slid the top off the top of the bus off the driver side, easing it to where I had been storing the Riviera top.

Dirt Removal
I was amazed by how dirty it was under that top.  First, I shop-vac'd.  Then I hand-scrubbed it with soapy water (and a scrubby-sided sponge).  Now its clean, but if you have one of these buses, think about how you are cleaning the inside of your camper when you open it up for the summer.  I admit I hadn't been cleaning there, but it never really looked that dirty.  With the Riviera top, the bus-roof will be more covered, so I'm not sure how I'll keep that clean.

That's it for now.  I still need to resolve my bad engine harness, and that's bugging me.  I'm still cash-strapped, so I can't buy a new one, and I'm afraid the summer will be over before I get running reliably.  I still haven't proven the cooling system ,and if I've learned anything on this project, its to assume that whatever you did will need to be redone.  So, I suspect the cooling system will need some attention before its road-ready.

pictures:
top - removing the cot
middle - bus without top
bottom - dirt scum-line just from the shop-vac

Friday, July 8, 2011

Musical Instruments

More from last weekend... a while back I talked about adding a second OBDII plug output up at the steering wheel.  Knowing that I wouldn't have the TDI dash-pod up front at any point in the near future, I figured I needed some instrumentation.  If you haven't seen the instrumentation on an old bus, Lemme paint a picture for you.

Original Bus Dash
On one side, you have the speedometer.  Next to it is the fuel gauge and on the other side you either have an analog clock (if you own a deluxe) or a big blank spot.  The fuel gauge also is home to all the other "instruments".  First, you have the turn signals.  When you turn on the flashers or fiddle with the turn signal arm, both green arrows flash.  Neat, eh?  Yes, and only a little confusing to a first-time bus driver.  Below the green flashers are 2 "idiot" lights.  The OIL light lets you know when you're out of oil, or your engine is about to explode.  If this light flickers, you need a rebuild, but if it lights up nice and bright, your oil pressure has dropped below 3psi and you're basically hosed.  Shut off the engine, its already dead.  The other light (GEN or ALT) lets you know that your electrical system is in trouble.  Like the OIL light, a fully lit buld means you're basically hosed, electrically.  A dim light means your alternator or generator is failing to produce a full 12V (it should be more like 14V, really).  A flickering light means you have regulator issues, but a full light could mean a bad alternator or a bad regulator.  There could be other reasons too, but those are the 2 most common.

Going above Stock
Why am I going on about this?  Well, those lights won't do my any good with this TDI engine.  Many original-engine drivers add gauges for exhaust temp and oil pressure, a tach, maybe other things.  So, this isn't terribly out of character for a bus.  Rather than spend a small fortune on different monitoring gauges, I wanted to do something a little different.  First, I thought "wouldn't it be neat to be able to plug in the VAG-COM on my laptop and use that".  I've since purchased an UltraGauge, which has all kinds of meters and things on it.  Most importantly, it has the coolant temperature on the front page, which is the most important one at this point.  So, on to the extending of the OBDII...

Add a Plug
I bought a made-in-China 3-wire OBDII output plug.  The plug was poorly documented (as was mine of the install), but I'll try to cover that a little bit now.  The plug has 3 wires: red for switched B+, black for ground and blue for the signal from the ECU.  From the original OBDII plug, the brown/white wire needs to be tapped into and extended.  I had run a few extra wires from front to back, and with the interior all torn open, the tie-in (after figuring out what to do) was pretty easy.  In an earlier post, I showed a picture of an early mounting.  I've since removed it from the e-brake mount and moved it up into the stock-radio hole.  It needs to be a-fixed, but that should be relatively straightforward once I get around to it.  I need to figure out what I'll be using that hole for before I do that.

Add-on OBDII Testing
Actually testing the install turned out to be very easy.  Apply B+ to the red wire.  Plug in the UltraGauge.  Turn ignition key to run.  Wait.  It was at this point that I discovered that my engine harness efforts were not yet complete..... much to my dismay.  The P-codes returned.  I swapped Justin's borrowed engine harness in again, and the codes lingered, but it may have been because the ECU remembered them from before.  So, I figured I missed a bad wire and completed the verification of the harness, even some wires I had no reason to believe were bad.  This is where things got interesting.

Broken Harness.  New one needed
I documented every wire, and verified connectivity through them all.  I'll convert the documentation to a colored drawing later, but the important bit is every wire was confirmed.  When I put the original harness back in, not only were the codes back, but now the ECU thought my engine temp had increased from ambient (69*) to 419*.  Clearly, that wasn't right, but it was telling.  I think my efforts to diagnose the problem actually caused the problem.  Argh.  I've spent a few hours trying to find a replacement plug or harness, or some other solution, but I think in the end, I'll be needing to buy another harness at a premium - eBarf prices.  Sigh... I did mention I was flat busted in my last post, so that won't be happening soon.  Rather than cut up the borrowed harness so it can receive my oil pressure signal, I may take short flights in the bus to see if the fans come on when they should.  I figure it shouldn't take much driving to figure it out.  I'm afraid of losing my window of opportunity this summer.

That's it for today.  I still have one last chunk of effort from last weekend to talk about.  I've had the boys this past week and it's been awesome.  Lots of computer gaming and movie watching after days of heavy play involving camp and hitting the apartment complex pool.  They head to their mom's on Sunday, and I'll be returning to bus work shortly thereafter.  Thanks for following along...

Monday, July 4, 2011

Seeing Red, Pushing White, Grooving Blue

Happy Independence Day.  Its been over a week again, and again I apologize for not posting in the middle at some point.  I actually broke out of my norm and had drinks with friends a few times this past week.  Good times.  I did get a bunch of stuff done on the bus, though, especially this weekend.  I'll pick one of the projects and focus on that.  I'll come back around on the other stuff.

Seeing Red
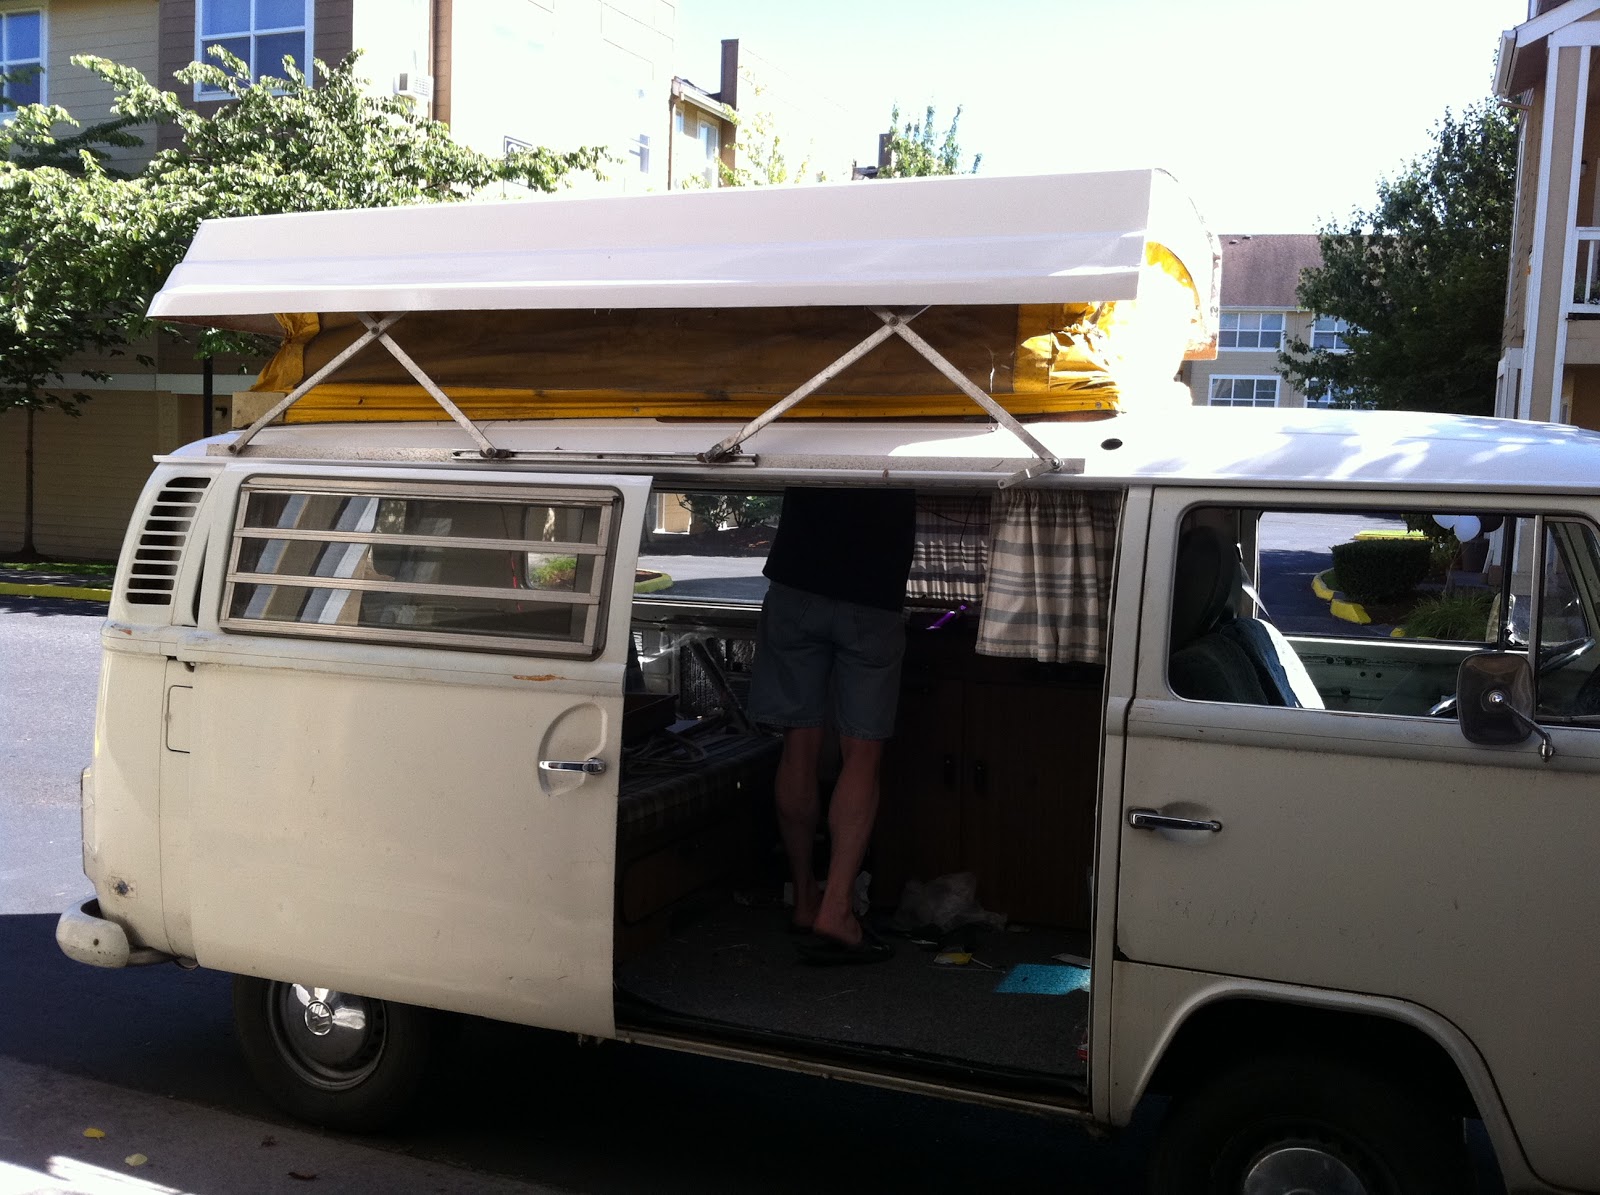
After paying the bills, and legal fees, I'm outta dough for a while.  Boo.  This doesn't change what I can and can't fix, just the order I operate in.  I can't do the interior carpeting, for example, cuz that requires carpet.  And, rather than focus on test drives (read: buying diesel @$4.30/gal), I'll be focusing on the pop-top.  I have all the necessary materials for prepping the work.  I'll need a few extra hands in a couple of weeks for actual install, but I'll get to that later.  First, the replacement...

I bought an old Riviera pop top (and all the corresponding guts) from a friend of mine almost by accident.  I originally went looking for just a replacement bellows for my original Westy pop top.  The old one had dry-rotted.  I'd planned to figure out a way of making the penthouse space large enough for 2 people, but the cost of a new bellows was like $300 plus shipping.  Ye-ouch!  Then, once I add in the cost and effort of making a double bed up there, it starts becoming some real scratch.  I hit the Samba and found a complete, local top.  I discovered, though that as I prepped the top and luggage rack, both had damage.  The luggage rack was / is especially bad, with at least 3 repair spots, none of which looked all that great.  I spent about 3 hours sanding them down, and they look passable now.  It was too late to go back and not go with the new top, but I'm kinda bummed about the damage spots.

Pushing White
The top, other than having the damage, had been sitting outside under a tarp for a while.  Being the great Northwest, that means a green haze appeared on it.  A full scrub-down, followed by running over both the rack and the top with 60-grit sandpaper prepared the surface for paint.  I already had a gallon of hi-gloss white, so I finished my Saturday rolling a coat of white oil onto them.  Since I don't have a clean room or a spray-booth, or even a vented garage, the inevitable bugs and dirt appeared in the paint.  Sunday, I sanded the bugs and dirt out, and then sanded everything with 220-grit.  Today, I rolled a second thin coat on.  Looks nice, but I'm concerned about how the high gloss on the damaged rack will look outside.  We'll see.

Grooving Blue
The 4th of July is the annual Oregon Food Bank Portland Blues Festival.  I hit the first day (Friday night), and listened on KBOO to all of the rest of the festival.  Great sounds, and it really powered me through all the stuff I did this weekend.  If I had a complaint, it would be KBOO's consistently losing their feed from the stage through the first 3 days.  I don't think they went more than an hour and 20 minutes without the music getting interupted with this horrible "GRZZT" noise, and then dead-air.  In fact, I'd bet they didn't have a single artist go through their entire set on the radio on Saturday or Sunday.  Whatever the problem, they had it solved for Sunday, though.

That's it for tonight.  I did a bunch of other things this weekend, so I have other posts to produce this week.  I have the boys, so my time may be limited.  Still, I'll try to at least hit some highlights.  Hal, I got your comment, and I was thinking the same thing!  I have an old bilge-blower around here somewhere.  I can tie that into some drier venting and whamo, I have a vented garage.  After I find the bilge-blower, it'll be a little easier... and after I get paid again :)

pictures:
top - the luggage rack after lots of sanding.  Still looks pretty awful
upper middle - the luggage rack after the first coat of paint.
lower middle - the state of the original paint.  boom box playing the Blues Festival in the background
bottom - mid-sanding.  I don't have a picture of it finished!  Ay.